
Special Situations
Some areas of the home present special challenges and should be dealt with differently from the rest of the painting project. In this chapter you’ll find directions for refinishing floors and painting stairs, stairwells, pipes, and masonry surfaces. These areas are important parts of your home and should be given the same attention as walls and ceilings. You will learn how to tackle these jobs and achieve good results.
Stairs and Stairwells
Although they may not take up a great deal of space, both stairs and stairwells require special treatment. A staircase is often the focal point in a home. Even a house that otherwise has little ornamentation may have an attractive staircase, meant to be the center of attention. Thus, the stairs should be restored and painted with care.
In most houses the stairs are in almost constant use by family members. So it is important to learn how to paints stairs while allowing people to use them. This will require careful timing and working in a specific sequence.
Staining or painting
In many older homes, stairs were built with high–quality woods that were originally stained rather than painted. If your stairs are painted and the house contains ornate moldings in other areas, the stairs may have decorative elements too, and you may consider stripping and staining them. Choose an inconspicuous part of the stairs and scrape off the paint. If there is buildup of layers of old paint, you will have to use a chemical stripper to remove the finish down to the bare wood. A carpenter should be able to identify the wood and advise you on the feasibility of stripping all the stairs. It may not be worth stripping and staining stairs if they are made of low-quality wood.
Choosing paint
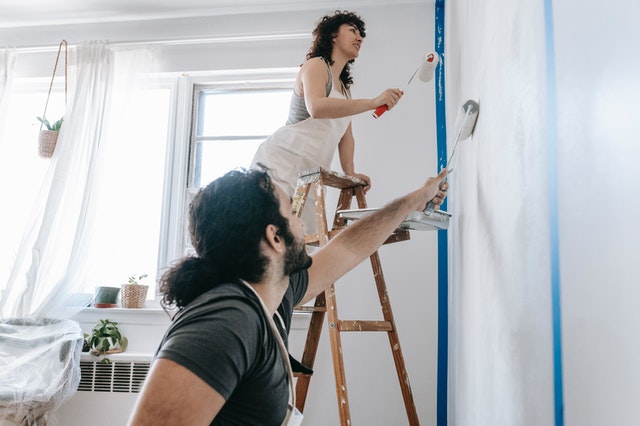
It is usually best to choose for a staircase wall the same paint sheen you selected for other walls in the house. But consider using a more washable sheen if the staircase walls have become dirty because people touch them as they use the stairs. You can avoid this problem, and increase safety, by installing a handrail on the wall.
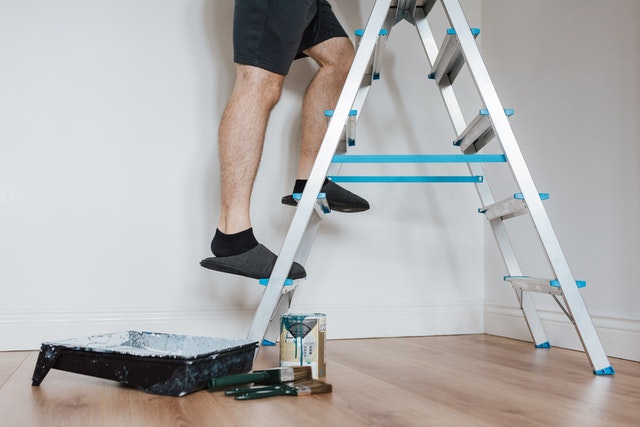
Special equipment
The high walls and ceilings of stairwells present their own set of challenges. You’ll need special ladder and scaffold setups to paint stairwells. Retractable stepladders, which allow you to adjust the height of each leg independently, come in handy for setting up on stairs. You may also need a straight ladder; of the type that is usually used for outdoor work, to anchor one side of the scaffold. A roller extension will also help you to reach the ceilings and tops of the high walls in a stairwell.
Working on staircases
The parts of a staircase
Even if the steps are covered with carpeting, you will still need to paint the stairwell and the balustrade, which includes of the railing. If you are adding a new railing, consider the reach of the elderly and children when deciding on a height for the handrail. One option is to install a double-height handrail. One option is to install a double-height handrail to accommodate everyone in the family.

Painting Stairs
1. Paint the handrail first
Place drop cloths on the steps to protect against spills and begin by painting the balustrade. Use a narrow brush to apply paint or strain in the direction of the wood grain. Start at the top of the handrail and work toward the bottom of the stairs.
2. Paint the balusters
After masking around the base of the balusters with heavy paper or painter’s tape, paint the balusters. Brush from the bottom up. Smooth out the paint on each baluster to remove drips before moving on. Replace the tape when it begins to pick up paint.
3. Paint the steps
If the stairs are in use while you are painting, paint half the width of each step and allow to dry. Paint the riser and the tread of each step, the paint the overhang. When the painted portion is dry, paint the other half of each step.
Working in stairwells
Scaffolding for the lower stairwell
For lower areas you may be able to use scaffolding with only a stepladder. Place the scaffold between the stepladder in the hall and one of the steps on the staircase. As you paint, move the scaffold down the stepladder rungs and the staircase steps.
Scaffolding for the upper stairwell
For high areas you will need a straight ladder and a stepladder. Place the scaffold between the stepladder at the top of the staircase and the straight ladder that is propped up against the wall. You can prevent the straight ladder from marking the wall by wrapping the top of the ladder with towels or by placing special rubber pads over the ends. To make it safe, the scaffold should overlap the ladder rungs by at least 12 inches.
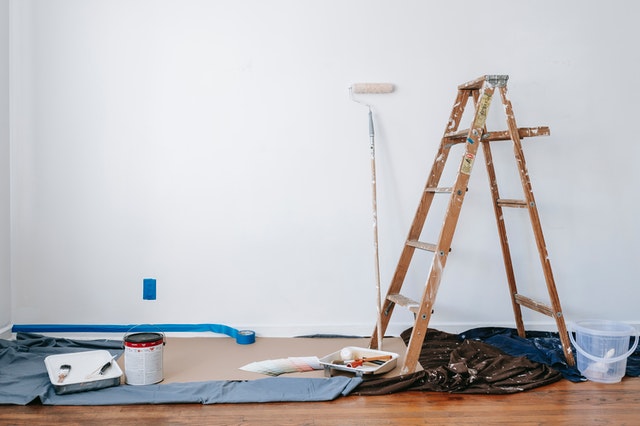
Floors
Almost every kind of floor covering can be painted. This section deals with preparing, painting, and refinishing wood floors and preparing and painting concrete floors.
Use only those paints that have been specially designed for covering floors and decks. Standard paints cannot withstand the amount of wear and tear that floors have to undergo as well as a good-quality floor paint can. Floor paints area available in both oil-and water-based formulations.
Wood floors can be stained to allow the grain of the wood to show through and then covered with a clear protective finish. There are two main types of finishes: clear varnishes and wax finishes. The most popular clear varnishes are oil-or-water-based polyurethanes and urethanes. They are relatively easy to apply and are available in a variety of sheens. Nowadays, a few people opt for a wax finish, but you may have to deal with a wax finish when stripping or repairing an old floor.

Whatever finish you decide on for your floor, you should begin the project by preparing the surface properly. You may need to make repairs, and you will have to strip off the old finish before applying paint or varnish.
Repairing damaged finishes
A wood floor that is showing its age because of damage or wear should be completely refinished or repainted. But if the scuffs and scratches are not sever, you may be able to make spot repairs and prolong the life of the existing finish.
To find out which type of finish is on the floor, conduct a simple test. A wax finish will smudge when you press against it with your finger. You will also be able to remove some wax by scraping the surface with the edge of a coin. If the surface flakes up in pieces rather than producing a waxy residue , the finish is varnish.
If you have to repair an area that has been colored with a stain, choose one that matches the color of the rest of the floor most closely. Use a piece of wood of the same type as your floor to experiment with different ratios of stain to thinner until you match the color satisfactorily.
Scratches in a polyurethane finish
Using a finish that matches the existing sheen, apply polyurethane varnish with an artist’s brush. Wipe up varnish that drips on other parts of the floor. You can buy kits for small repairs on this type of finish.
Scratches in a wax finish
First of all, buff the scratched area with a clean cloth. If the damage is still there, buff once more with extra-fine steel wool. When finished, apply a light coating of wax to the damaged area and buff again.
Stain or paint
The natural grain of wood has an attractive pattern that is generally allowed to show through the finish of a wood floor. Usually, wood floors are treated with a light stain or left natural, with a clear, protective finish completing the job. But there are some cases in which you may consider painting over a natural-wood floor. A rich, opaque color may suit your overall decorating scheme better than a clear finish does. Or it may be that the floor is so badly damaged, or made from such an inferior wood, that it is unsightly and would be best covered with paint.
It is possible to combine paint with traditional, clear-finish products on the same floor. Some professional designers decorate a wood floor by stenciling a painted design on the floor. Another method of decoration is to paint a border around the edges of a room while staining the rest of the floor.
Preparing wood floors for finishing
Whether you are painting or staining your wood floor, you must begin by making the necessary repairs. These preparations may include replacing wood plugs, fixing warped planks, or removing and replacing damaged boards. It may be necessary to sand a wood floor, especially if you intend to stain or apply a clear finish to the floor. However, make sure that before sanding, you countersink all protruding nail heads, using a hammer and nail set. This helps to secure the planks to the floor and prevents the nails from ripping sandpaper.
TABLE (AS ON THE PDF)
Removing the base shoe
Gently pry off the base shoe, the narrow strip of molding installed at the bottom of the baseboard. Wedge a thin piece of wood or heavy cardboard between the baseboard and the pry bar to protect the finish. Removing the base shoe allows you to sand and apply finish right up to the edge of the wall. When the base shoe is reinstalled, it will hide any rough edges around the perimeter of the room.
Replacing wood plugs
1. Tap the dowels into holes
Some floors have plugs that hide screw heads. If you cannot find replacements for missing plugs, use hardwood dowels. Coat the sides of the dowel with carpenter’s glue and tap it into the hole.
2. Cut the dowel
When the glue dries, cut the part of the dowel that sticks above the floor with a chisel or fine-tooth saw. Sand the dowel even with the floor. Then stain it to match the rest of the floor.
Fixing warped planks
1. Drill pilot holes
Realign warped planks by screwing them back into position. First, drill pilot holes, slightly smaller than the screws, every 3 or 4 inches along the damaged area. The screws should be about ¼ inch shorter than the thickness of the plank and subfloor.
2. Screw back into position
Drive wood screws into the holes. This will pull the plank back. If more than one plank is buckled, work from the edges of the damaged are toward the centre. Hide the repair by countersinking the screws and covering with wood plugs.
Removing damaged boards
To remove a complete board
Remove a complete board that is damaged by splitting it with a wood chisel in a number of places. Then pry up the pieces. Remove nails with a claw hammer.
To remove part of a board
To remove the damaged section of a large board, drill a series of holes at each end of the damaged area. Square the edges with a wood chisel. Replace the board.
Replacing a tongue-and-grove board
1. Prepare the new board
Cut the new board to the correct length to fill the gap. Turn the board upside down and remove the bottom lip of the groove with a chisel.
2. Glue the edges
Apply carpenter’s glue to the edges of the tongue and the remaining part of the groove. Tip the section at an angle and insert the tongue into the groove of the adjoining plank.