
Installing New Drywall is an art and it is better left to professionals. But is it worth trying for DIY Homeowners. Excerpt from the book called “Tiling” by “Josh Garskof“. Very easy Drywall installation process explained below:
TEST-FIT THE FIRST BOARD:
Position the first sheet with one edge against the ceiling and one against an adjacent wall. In the case of drywall and green board, which come in 4-by-8-foot
Sheets, an 8-foot edge should ride against the ceiling and a 4-foot edge against the wall. Fiberglass-coated boards come in a variety of sizes and can be oriented in any direction. For drywall, the white or green paper faces away from the studs. For fiberglass-coated boards, the gray surface faces away from the studs. If the end of the board that is not butting against the adjacent wall happens to fall down the center of a stud, you’re ready to fasten it. If it doesn’t, have a helper hold the board in place while you use a pencil to mark the location of the center of the stud nearest the end of the board. You can use a tape measure instead of holding the sheet in place, of course, but you may wind up with less accurate results, especially on complex cuts.
SCORE THE BOARD:
With the board leaning against a wall, align a T-square against the mark and use a sharp utility knife to score the face of the board.
SANP THE BOARD:
Snap the board along the score line by bending away from the cut side. Slice the paper backing on the other side of the board to complete the cut.
FASTEN THE BOARD:
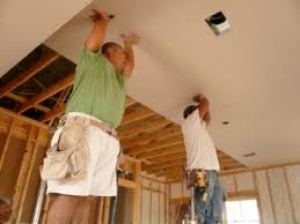
Reposition the sheet on the wall and, using screws approved for the type of board you’re using, fasten it in place by inserting a screw every 6 inches or so along every stud. Repeat this process by butting another sheet against the end of the first, and continue moving across the wall. Then run another row of boards under the first, making sure the keep them tight against the boards above and offsetting their joints by at least one stud. It’s also a good idea to shim the bottom row up off the floor by about ¼ inch to make fitting the sheet easier and to prevent moisture from wicking up into the material. Place the cut edge along the floor and the factory edge against the boards above.
SKIP THE JOINT COMPONUND:
There’s no need to go through all of the usual steps of taping the drywall seams that you’d do if you were painting the wall. In fact, standard joint compound is water soluble, so the moisture in mortars and mastics can dissolve it slightly, leading to bonding problems. Most tile setters leave the joints untapped and simply fill them with mastic or thinset as they lay the tiles. But if there are gaps or uneven spots between sheets, you could fill them with title adhesive: Cover apply one thin coat of the thinset or mastic you’re using to set the tiles. Smooth the material flush with the surface so you don’t create any high spots.
MAKING NOTCHES:
To notch around electrical receptacles or windows, orient the board the same way that it will be installed and place it as close to its future home as possible. Use a tape measure and a pencil to mark the cuts you’ll need.
Then use a drywall saw to make the initial cuts. Leaving the last line to be scored with a utility knife, snapped, and then cut again. Put the board into opposition and check the fit. If you need to widen the hole, mark the added opening you need on the board while it’s in place. If the hole is too wide in one area, you can fill it later.
Continue Reading “Drywall Installation“