This is an excerpt from the Book called “Home Improvement“. Continue reading to learn more about Installing a Door Lock, thanks to the author.
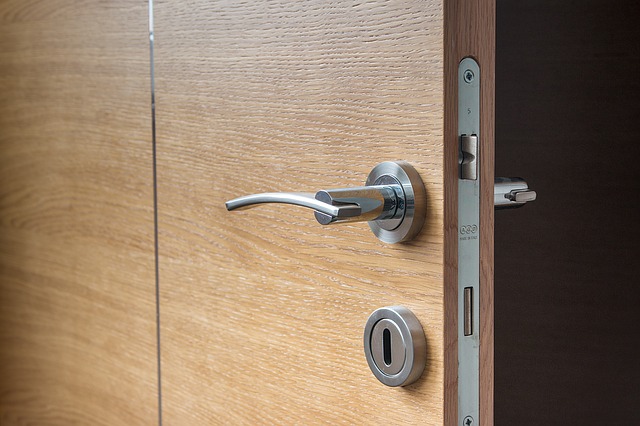
If you’re installing a new lock on your door, chances are it’s a security (or dead-bolt) lock. Entrance door and passage locks are usually already in place. If you do find yourself replacing an entrance or passage lock, it’s much like installing a dead bolt. Instead of putting in the doorknobs. If you’re putting in a new door and lock, get a predrilled door—the hole for the knob and latch are already there. Just screw the lock in place.
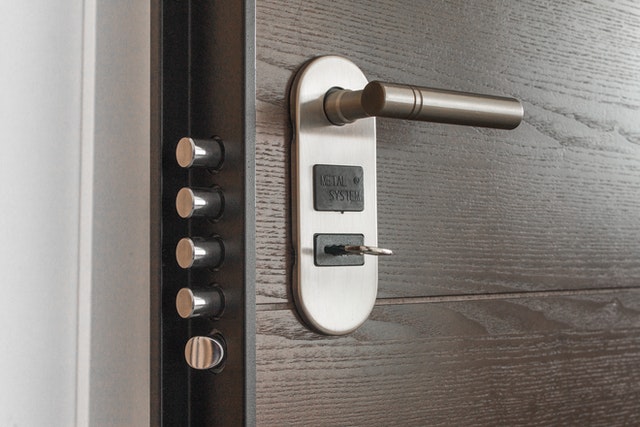
When you buy a dead bolt you’ll have a few choices. The biggest is how you want to open the door. Single-cylinder locks can be opened from the inside with a thumb latch. Double-cylinder locks require a key from either side.
In most applications, a single cylinder is fine. A key opens it from the outside; a twist of the thumbscrew opens it from the inside. But if you have a door with a window, a double cylinder provides more security. Someone breaking the window will still need a key to get in. however, someone needing to get out—in the case of a fire, for example—will also need a key. Most people solve the problem by leaving the key in the inside cylinder; this helps in the event of fire but won’t prevent break-ins.

All door locks have what is called a “setback”—the distance from the edge of the door to the center of the knob or cylinder. The two standard setbacks are 2 ¾ and 2 3/8 inches. If you’re drilling the holes yourself, a lock with either setback is fine, and neither has an advantage over the other. If the hole is predrilled, measure the setback and get a lock that matches. If you arrive at the store only to discover you forgot the measurements, good news. Both locks and dead bolts are available with an adjustable setback.
- Measure to find the lock location. Tape the cardboard template, supplied with the lockset, onto the door. Use a nail or awl to mark the center of the cylinder on the face and the latch bolt on the edge of the door.
- Bore a hole for the lock cylinder with a hole saw and drill. To avoid splintering the door, drill through one side until the drill bit just starts to come out the other side. Remove the hole saw and then complete the hole from the opposite side of the door.
- Using a spade bit, drill to bore the latch bolt hole from the edge of the door into the cylinder hole, keep the drill perpendicular to the door edge while drilling. To keep from boring at an Angele, slip a close-fitting metal washer over the bit. If the drill is level the washer won’t walk along.
- The plate on the bolt mechanism needs to be inset so that it’s flush with the edge of the door. Lay out the recess by putting the bolt in its hole. Line up the plate and screw it into the door. Trace around the plate with a utility knife Remove the plate from the door.
- cut the outline of the recess by holding a chisel with the bevel side facing the inside of the recess. Tap the butt end lightly with a mallet or hammer until the cut is as deep as the plate is thick. To help gauge the depth, measure back from the cutting edge of the chisel by the thickness of the plate, and draw a line on the chisel.
- To help remove the waste, make a series of parallel depth cuts ¼ inch apart across the recess while holding the chisel at a 45-degree angle. Drive the chisel with light mallet blows to the butt end of the chisel.
- Cut out the waste chips by holding the chisel at a low angle with the bevel side toward the work surface. Striking the chisel with a mallet will drive the chisel too deep push the chisel by hand to make the art.
- Insert the latch bolt in the edge hole. Insert the lock tailpiece (see illustration at left) through the latch bolt mechanism, and test-fit the cylinders. If the long is too long. Snapit at the indentations by bending it with one set of pliers while holding it with a second set.
- Put the strike plate in place and trace around the hole. Mark the center. Drill the latch both bole with a spade bit. Install the strike plate using the retaining screws provided with the lockset. Trace aroundif witha knife, and cut a recess for it the same way you cut one for the bolt. Screw the plate in place.
Making An Opening For A Door Or Window
The first step in cutting an opening for a door or window is to buy the door or window, then read the directions. What you’re looking for is the size of the rough opening—the distance between the pieces of framing that support the door or window. It will be slightly larger than the size of the door or window.
The opening for doors, for example, is usually 2 inches larger than the door size (but follow the directions for your door).


This leaves room for two ¾ inch doorjambs. Plus ½ inch of wiggle room that you’ll fill with shims for full-size examples of how door and window openings are framed.
- Remove the trim with a pry bar and hammer, then protect the floor with drop cloths. Cover interior doorways with plastic to confine dust. Shut off power and water that may run through the wall. Remove electrical cover plates and heating duct covers if they are located in the area to be removed.
- Mark the area of the wall you will remove. Put on safety glasses and a dust mask. On drywall, cut along the layout line with a utility knife. On plaster, cut the line with a circular saw, cutting through the lath but not into the studs. Remove the plaster or drywall surface with a hammer and pry bar.
- All exterior walls are load-bearing, so you will need to provide support for the floor and roof above while you work. Begin by using a stud finder to locale the joists nearest the area you’re opening. Brace them with jack posts and a 36-inch 2×6, which is long enough to span the joists. Interior walls that have a double top plate (see-inset) are also load-bearing and well need the same support.
- Remove the studs. (First relocate wires and pipes that are in the way.) Cut them at top and bottom with a reciprocating saw or push the studs from side to side and remove them with a pry bar. If possible reuse some of the material for jack or cripple studs when you frame the opening.
- Lay out the framing on the soleplate. Start by drawing lines marking the edges of the rough opening. Measure 3 inches outside the opening and draw a line marking the outside edge of the king study you’ll use to help frame the opening. What your finished opening will look like.
- Toenail the king studs in place, with four 8d nails at each end. (Face-nail with 16 d nails; toenail with 8d.) Then cut a jack stud long enough to reach from the soleplate to the top of the rough opening. Nail it to the king studs you just installed.
- On non-load-bearing walls, nail a 2*4 header across the top of the trimmers. On load-bearing walls, nail a built-up header in place. Cut short pieces of 2*4 to between the top of the header and the top plate. Nail pieces with 16d nails and toenail them in place with dour 8d nails.
- If framing a door, cut through and remove the soleplate.
If framing a window, mark the bottom of the rough opening on the jack studs. Cut a rough sill to fit snugly between the jack studs, and wedge if in place. Make sure it’s level and toenail it in place. Cut cripple studs to fit between the sill and soleplate-one under each and every 16 inches.
- Nail the cripple studs in place. A For doors toenail cripple studs between the header and the top plate every 16 inches. B. For windows install cripple studs every 16 inches between the sill and the soleplate and the header and the top plate.
- When you’re ready to install the door or window, remove the wall section behind it. Strait by drilling through the wall at each corner of the rough opening. Put the blade of a reciprocating . One of the holes and cut along the door, until you reach the next hole. Continue until you’ve cut out the sheathing.
Making Headers
A header is a wooden beam that provides support for the framing above it. It spans a doorway or window in a load-bearing wall-and all outside walls are load-bearing. On a non-load-bearing wall, you won’t need a header over the doorway. A single 2* 4 laid flat is enough. (Some interior walls are load-bearing; to determine. Removing a Wall.)

Headers are built up to be as wide as the surrounding framing. In 2*4 framing, for example, the header is a sandwich of two 2*4s on edge, with ½- inch plywood in the middle. The “real” dimensions of 2*4s are 1 ½ inches by 3 ½ inches, so the built-up beam is 3 ½ inches thick and fits perfectly in place.
If the thickness of the header is determined by the surrounding framing, the width depends on the application. Codes vary; but generally speaking, the solid wood in a header for a opening up to 4 feet long should be 2*4s. From 4 to 6 feet, the lumber should be 2*6s. (Beyond that, you should call a carpenter.)
When you make a header, cut a piece of ½- inch plywood to the same width as the 2*, and then cut all three to length. Make a sandwich, and nail it together with 16d nails at 16-inch (or 24-inch if that is your stud span) centers along the edges.
The section of wall that supports a header is framed a bit differently from the rest of the wall. The header fits between two “King studs,” which run floor to ceiling. The header sits on top of two “jack studs,” which are nailed tyo and supported by the king studs. In practice, you’ll install both the king and jack studs before you put the header in place.
Because codes vary, don’t drive a nail until you’ve talked with your local building inspector. You must get a permit anyway. Ask a few questions and get some advice while you’re at the permit office.

