
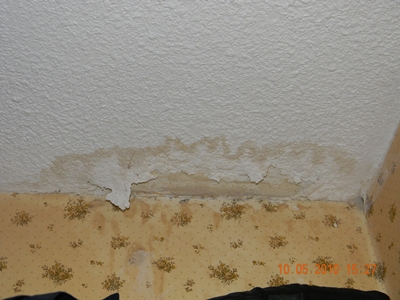
Drywall has been around since the 1940′s and has grown into the main building source for walls and ceilings. There are two main reasons why drywall has become so popular. Drywall is dirt cheap, it cost about 8 dollars for one sheet. Repairing drywall is very easy, all you need is some easy to use tools and you can start hanging drywall too. So How To Repair Drywall, just follow the guidelines!
1. The first thing that you need before you learn to hang drywall is to check your local building codes. You must have certain water resistant drywall sheets in the bathroom and fire resistant drywall for your garage. Also, before you begin repairing drywall, you need to gather the tools needed. You need a thin lightweight trowel because a light touch is key when making seams on your drywall. You will also need paper tape. This will produce a joint that is strong when you also use compound with it.
2. The next step before you begin to repair drywall is too remove all of the old drywall that is there. You will need to rip the old drywall from the studs and the ceiling. You have to be very careful when you start tearing down drywall because you want to avoid all the electrical wires around. You want to make sure that you do a good job when removing the old dry wall, this will make your new installation of drywall much easier. You may also want to get out a broom to sweep up all the little debris. You will also want to remove all the nails from the studs, you want to make sure that you have a flat surface to hang your drywall.
3. The next thing that you will need to do is measure the square footage of your walls and ceilings. You want to end up with as few seams as possible because taping seams is the hardest thing to master when you are learning how to repair drywall. A typical drywall sheet for walls is 4 by 8 feet and they are typically installed so that the long side is from the floor to the ceiling. Other places will offer drywall sheets that are longer but every sheet will be 4 feet wide.
4. When you go to purchase your drywall make sure to get larger drywall pieces. The drawback to this is that the bigger drywall pieces are harder to handle but the bigger pieces will create less seams for you tape. Taping is an area where most amateurs have trouble. If you have a second person helping you handle the larger pieces then this should not be an issue. If you need to store the drywall make sure that you store the drywall flat so that it wont bend or break. When you go to purchase your drywall at your local store you can ask some question to the workers. They should be able to help you out a lot.
5. When you start to repair drywall, you need to hang them from the top down, this means that you need to start with the ceiling first. Before you begin to hang drywall you need to check the joist of your ceiling for any bowed joists. If your joists are bowed then you will have to use drywall shims. If your ceiling is 15 feet long then you should use the longest drywall sheet available because you will have less seams this way to tape. Use a helper to hold the drywall sheet up and hammer in some drywall nails about a foot and a half apart from each other. Then just cut the excess drywall using a drywall knife. After you finish the ceilings, you should move onto the walls in the same fashion.
6. When hanging drywall you want to make sure that you protect your wiring. You can easily pierce some wires from the drywall nails and this will create a fire hazard. To solve this problem you need to install steel plates over the wires and nail them to the studs. Another problem when installing drywall on the walls is electrical outlets. Just measure the box and transfer it onto the drywall and if the measurements are not perfectly lined up then just use a drywall rasp.
7. Next you need to start on the outside corners and to do this you need to cut metal corner beads. Then you need to make sure that it is properly aligned and then nail one side into the wall and then the second side. You need to make sure that the nails are a foot and half apart and for the inside corners spread compound on each side.
8. The final step is to start taping the seams. You need to tape the outside seams first. You do this by using at least a 4 inch wide knife to spread the compound around the seams. Then press paper tape into the joints and wipe away any excess. When this drys, you need to apply a second coat of the compound and when this drys, you will need to sand it down and apply another 2 more coats. When you begin taping the seams you may notice that the drywall may have some really huge gaps but you should not worry because the compound along with the tape will help smooth over everything.
Conclusion:
These are all the basic tips for you to learn how to repair drywall. Any two person team that knows some very basic carpentry skills will be able to complete a small room in a weekend. The hardest part to get the hang of is the taping. If you are still not sure that you can do this, then you can go to your local store to ask some questions, you can also contact a drywall professional and ask to spend the day with them to see how they do it and there are a bunch of videos and books online on the subject as well. With the wealth of information online you should not have any problems with your first drywall repairing job.