
We would says its a art, framing walls and roof is one of the challenging tasks in building houses. This article focuses on Porches, here is an interesting article about PORCHE building by “Ultimate Guide PORCHES” by “Steve Cory”, little spinet from the book for our readers
PORCH WALLS
Plan for posts that are as consistently spaced as possible for a neat appearance. Space than is allowed by local codes. Make sure any screening or screen/window systems will fit between the posts.
Even if they will be clad with trim, posts will largely determine the look of the porch. Buy posts that are straight; you won’t be able to straighten them while building. Posts should be number one grade of better and dry so that they won’t twist or warp. If the frame will not be completely covered with siding, use boards that you won’t mind looking at for years—with few cracks and other defects.
When building a wall, take the time to repeatedly check and recheck for level, plumb, straightness, and tight joints. It’s OK to end up with minor flaws—say, walls that are out of plumb by ¼ inch or so. But if you start out with even small imperfections, they will tend to multiply as you proceed, so aim for perfection. If the deck is out of level, use shims to level the bottom plate.
Unless you are very skilled with a circular saw, cut all pieces with a power miter saw, and check all pieces to be sure they are cut precisely.
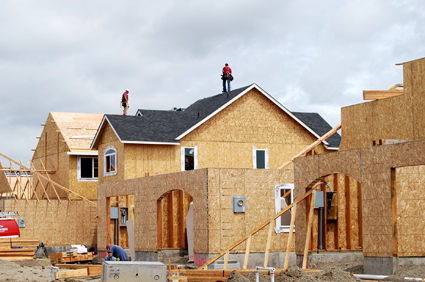
This roof has no rafter ties, so there must be a central post to support the roof’s ridge beam.
FRAMING WALLS AND ROOF – STEPS :
These steps show building to support a roof with rafter ties, so there is no need for a center post to support the ridge beam. If you will have no rafter ties, be sure to centrally position a post so it supports the ridge beam.
A common porch wall arrangement uses 4×4 posts, 2×4 bottom plate, and 1×1 to plate. (Later, you’ll build a beam to rest on top of the top plate). Your building department may specify different dimensions for the lumber.
1 At each corner of the porch deck, mark spots 31/2 in. from the outside of the framing, indicating where the inside of the 2×4 plates will be. Snap chalk lines between the marks.
2 Cut 2×4 bottom plates, and lay them in position on the deck. Parallel plates should be equal in length. Check the corners for square using a framing square. You can also measure the distances between diagonal corners. If they are equal, the layout is square.
3 Where the porch wall will about the house, hold a level against the siding to check that you can install posts that are plumb. If not, you may need to move the bottom plate (and the wall), rip-cut or trim a post, or remove some siding pieces so that the post you install will be plumb.
4 Use a measuring tape and an angle square to lay out the post positions Mark for both sides of each post, and draw an X between the marks. Double-check all the post positions for accuracy. Be sure that any doors of windows you plan to install will fit between the posts.
5 Cut top plates (1x4s in this example) to the same lengths as the bottom plates. Place them on top of the bottom plates, and mark them for the positions of the posts as well.
6 Cut posts to the height of the walls, minus the thicknesses of the top and bottom plate and the width of the beam. If they will be visible, cut off as many flaws as possible. If they will be covered with trim on the outside only, mark the most flawed sides so that you can position them where they will be covered.
7 Lay out the plates and posts on the deck, and position the post ends inside the Xs you have drawn. (The top sides of the posts and the plate edges will end up facing outward) At each joint check to ensure that the post’s face is flush with the edge of the plate and correctly positioned. Drive four or more nails to fasten.
8 Working with at least one helper, raise the wall into position.
9 Costly nudge the assembly so that it aligns with the chalk lines snapped earlier. If there is a post against the house, check that it is plumb on the side that meets the house.
10 Once you are certain that the wall is aligned with the chalk line, the end line, and perhaps a wall, drive nails through the bottom plate and into framing—not just into decking.
11 Build, raise, and fasten the other walls in the same way. You may want to attach temporary bracing to the walls as you work, but actually the nails driven through the bottom plate hold surprisingly well, unless it is a windy day.
12 Check posts for plumb and drive only a few screws to hold them in place. Working with a helper, attach one end of an angled brace; check for plumb; then attach the other end. Attach two braces at each corner.
13 Attach braces near the house as well. Again, check for plumb as you work.
Continue reading about “Soundproofing“